How to Capture Leads with Facebook Lead Ads
Facebook Lead Ads is a new product in Facebook’s Advertising Platform, which helps you cast a wider net for attracting new leads. Instead of just passively planting a form on your website for potential leads to fill out, you’re reaching out to those leads proactively on Facebook. Plus, you can target specific types of leads (by age, location, etc.) using Facebook Lead Ads.
What are Facebook Lead Ads?
A Facebook Lead Ad looks like a traditional Facebook Ad, but—when a Facebook user clicks on one—it displays a form that is pre-populated with the user’s phone number, email address, and other information the user has already given to Facebook.
That means Facebook users can submit their information to you in just a click, which results in more leads for you.
Once you’ve captured the leads, you can use Zapier’s Facebook Lead Ads integration to send the leads directly to the email marketing and CRM tools you use such as MailChimp, ActiveCampaign, or Infusionsoft.
This article will show you how to set up a Facebook Lead Ad and how to send your Facebook leads to your email service provider or CRM using Zapier.
How Do You Set up a Facebook Lead Ads?
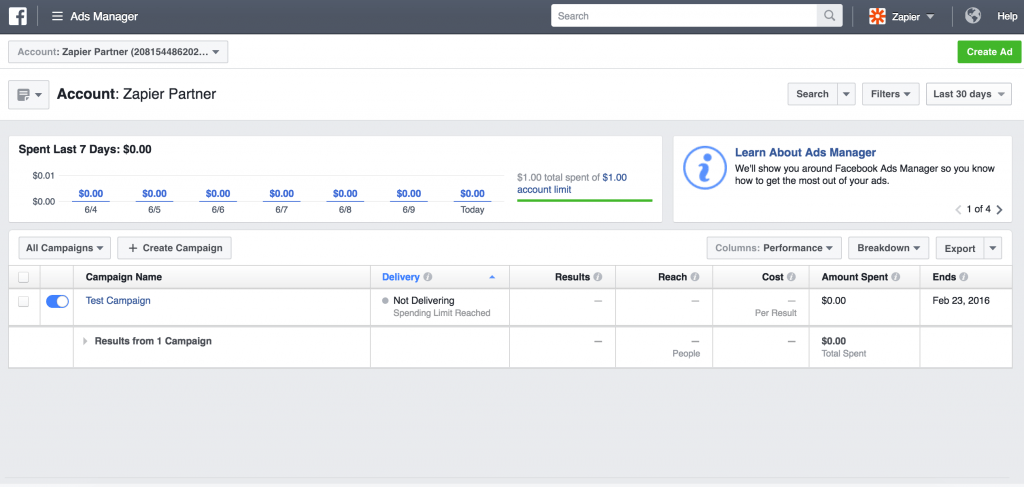
1) Sign into your Facebook account (in which you are an admin or an editor of a Facebook page).
You can create a new Facebook lead ad form by going to your Ads Manager or Power Editor. In Ads Manager, click ‘Create Ad’. In Power Editor, click ‘Create Campaign’.
2) Click ‘Collect leads for your business’ as your campaign objective.
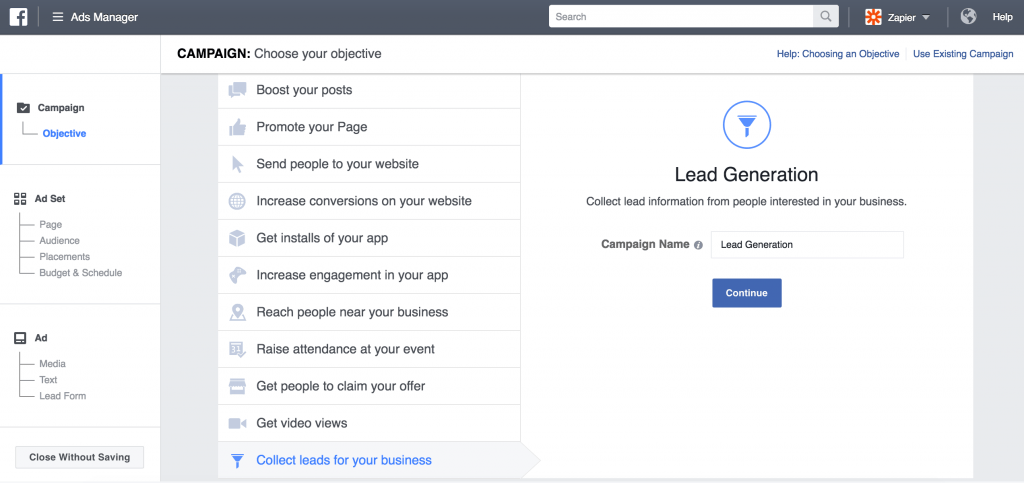
3) Once you agree to the Terms of Service, you can customize your ad (like choosing the location, age, interests of its audience, and determining text images to include in the ad).
4) Under ‘What information do you want to collect from people?’ click ‘Create New Form’.
5) Give your form a name and select a language. Keep in mind the language you choose here is the language your audience will view your form in.
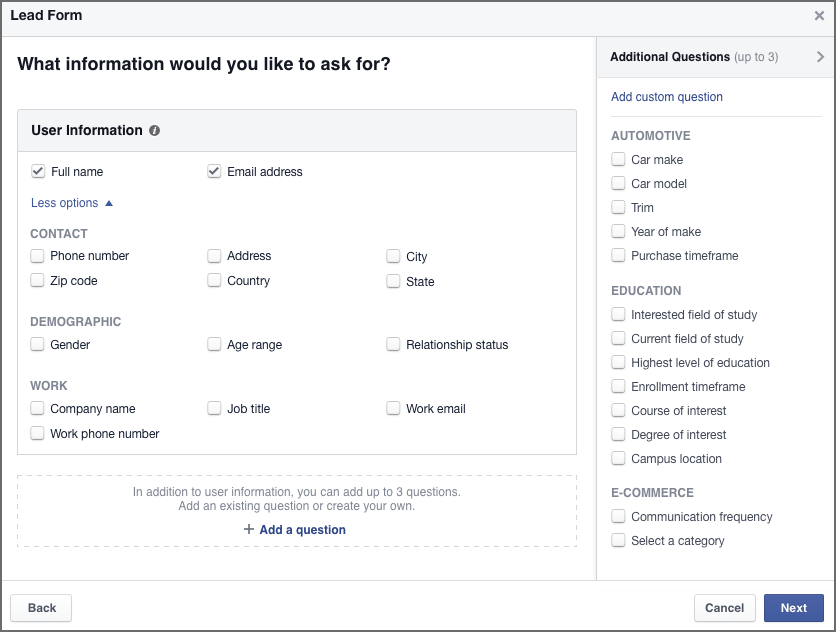
6) Add a context card. Under ‘What information would you like to ask for?’ you’ll see ‘Full name’ and ‘Email address’ checked. You can also click ‘More options’ if you want to ask for more info. When you’re finished adding questions (3 is the maximum), click ‘Next’.
7) Add a link to your privacy policy and any additional disclaimers you may have, then click ‘Next’.
8) Enter the website URL you want people to go to after they complete your form, then click ‘Next’.
9) Navigate through your form preview and make changes if necessary. Click ‘Create Form’.
How Do You Add Facebook Leads Directly to Your Mailing List or CRM?
You can send your leads from Facebook Lead Ads to a variety of tools by using Zapier. You can either use the pre-made Zapier integration by clicking the ‘Use this Zap’ button at the top of this page or by creating your own from scratch. Let’s walk through how to create your own ‘Zap’, aka integration, between Facebook Lead Ads and MailChimp, for example.
1) Log into your Zapier account and click the orange ‘Make A Zap!’ button at the top of the page.
2) You will land on an editing page where you can tell Zapier what data to pull and where you want to put it. You can name your Zap in the top left corner of that page.
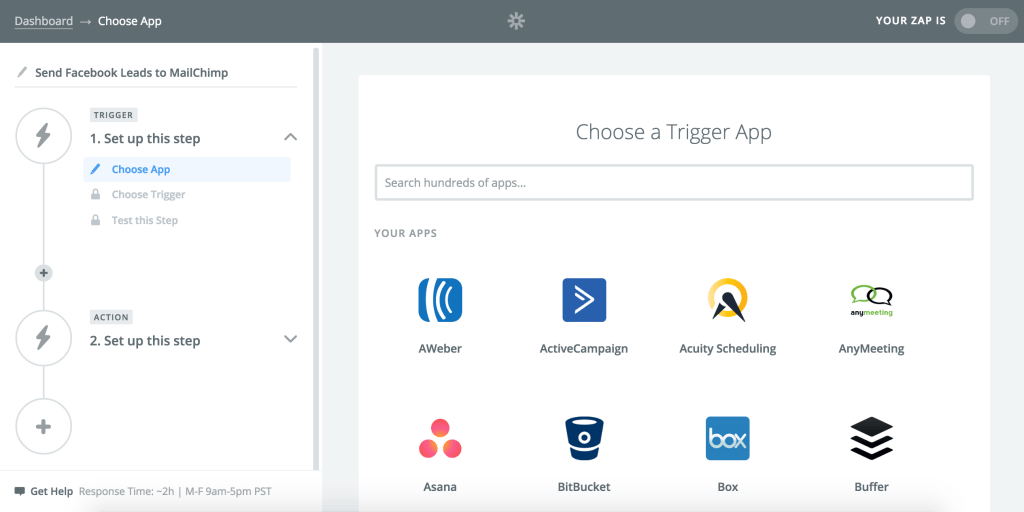
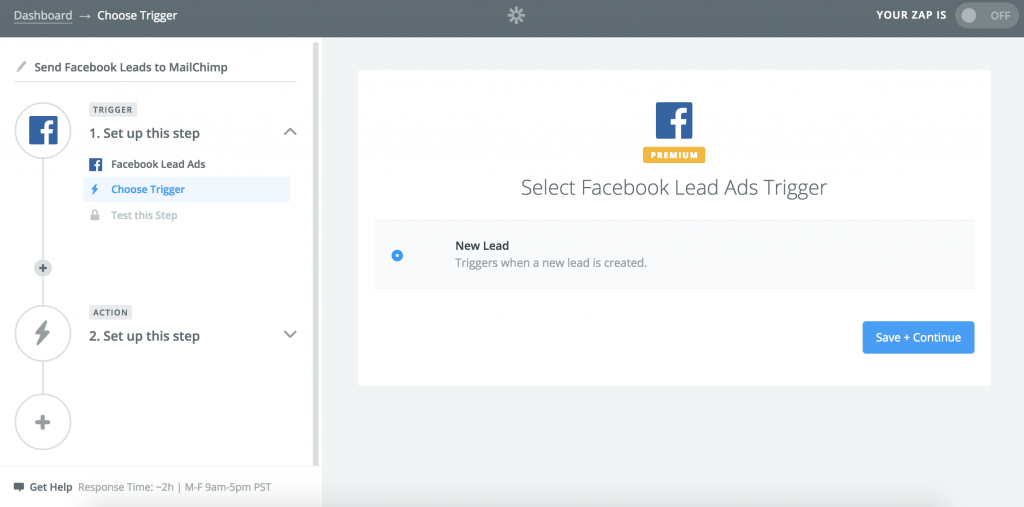
3) In Step 1 (the Trigger step) of the Zap, type ‘Facebook Lead Ads’ in the ‘Choose a Trigger App’ search bar.
4) Select ‘New Lead’ and then click ‘Save + Continue’.
5) Select ‘Connect a New Account’ and enter your Facebook email address and password in the pop-up box. Then click ‘Save + Continue’.
6) From the drop-down boxes, choose a Facebook page and a previously built Facebook Lead Ads form. Click ‘Continue’.

7) Make sure you have one new existing lead from the Facebook Lead Ads form you selected. Then click ‘Fetch + Continue’.
8) Once you see the ‘Test Successful’ message, click ‘Continue’.

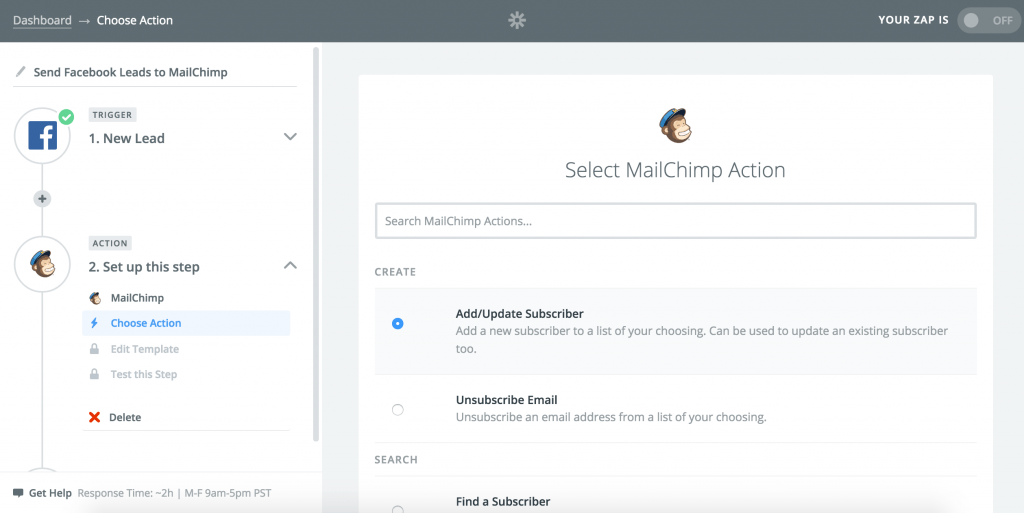
9) In Step 2 (the Action step) of the Zap, type ‘MailChimp’ in the ‘Choose an Action App’ search bar.
10) Select the ‘Add/Update Subscriber’ option, then click ‘Save + Continue’.
11) Select ‘Connect a New Account’ and enter your MailChimp username and password in the pop-up box. Then click ‘Save + Continue’ back on the main screen.
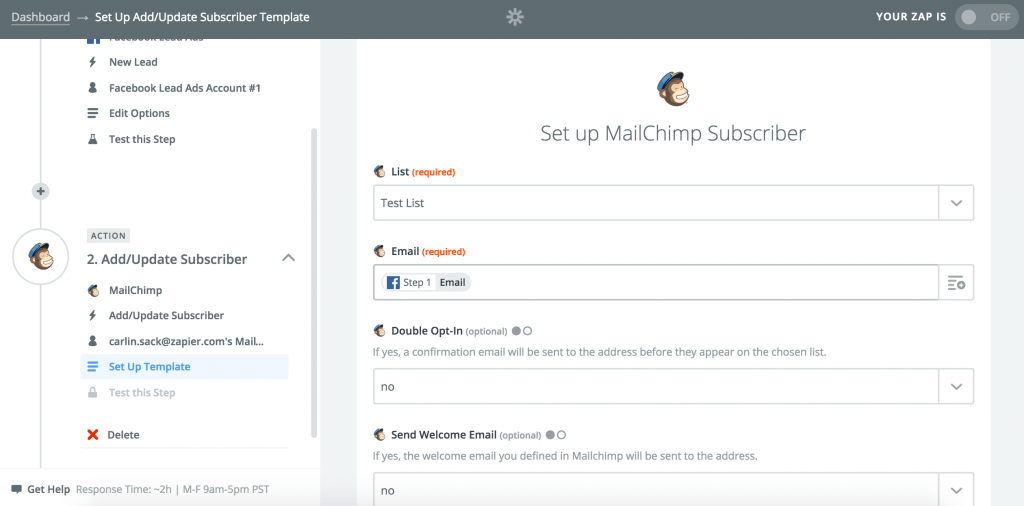
12) Now you can fill in the fields so that the Zap is customized to your data. You need to tell the Zap where you want the Facebook Lead Ads data to go in MailChimp. Click the drop-down arrows on the right side of each field to show the fields that are available from Facebook Lead Ads to add in each section. Click ‘Continue’.
13) On the next page, you can view the test data that will be added to MailChimp. Click ‘Continue’.
14) Wait for the ‘Test Successful’ message and click ‘Finish’.
15) Choose a folder to store your Zap in (optional). Toggle the Zap to ‘On’ and wait for the green checkmark to appear.
Now your new leads from Facebook Lead Ads will be automatically be added to MailChimp.
Everything You Need to Know about Facebook Lead Ads Infographic

By: Connectio